
Most people can begin gentle, non-weight-bearing movement within 24 to 72 hours of spraining their ankle, but knowing when to start exercise after a sprained ankle depends on your sprain grade, pain level, and swelling. Starting too early increases re-injury risk; waiting too long slows healing and weakens the joint.
Ankle sprains are among the most common musculoskeletal injuries worldwide. According to the National Athletic Trainers Association (NATA), approximately 23,000 ankle sprains occur every day in the United States alone. Research published in the Journal of Orthopaedic and Sports Physical Therapy consistently shows that structured early mobilization outperforms complete rest for recovery speed and long-term joint stability.
This guide walks you through the exact exercise timeline by sprain grade, the best exercises for each recovery phase, safe cardio and upper body training options, and the warning signs that mean you need professional assessment. Whether you sprained your ankle yesterday or three weeks ago, you’ll find a clear, practical path forward here.
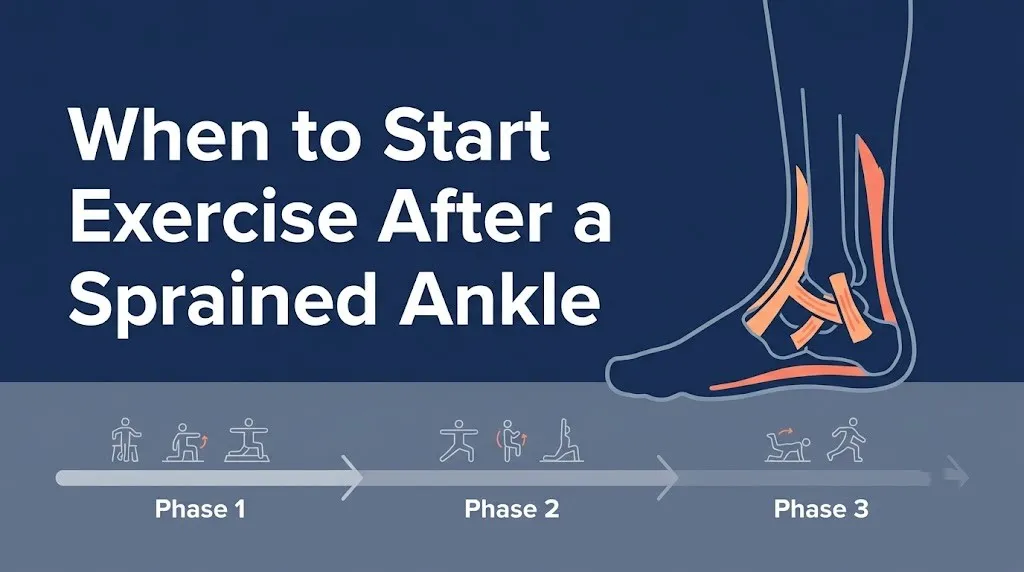
When to Start Exercise After a Sprained Ankle
The right time to start exercise after a sprained ankle is typically 24 to 72 hours after injury for gentle range of motion work, but full gym training and loaded exercise require a longer window that depends entirely on sprain severity.
Pain and swelling are your primary guides in the first 48 hours. If you can gently rotate your ankle without sharp, stabbing pain, that’s a signal your ligaments may tolerate light movement. If you feel intense pain with any movement or cannot bear any weight, that’s a signal to hold off and seek assessment.
The old advice of total rest until pain was completely gone has been replaced by current clinical thinking. The American College of Sports Medicine (ACSM) now supports the PEACE and LOAD framework, which stands for Protection, Elevation, Avoid anti-inflammatories early, Compression, and Education (PEACE), followed by Load, Optimism, Vascularization, and Exercise (LOAD). This framework specifically calls for gradual, progressive loading beginning in the early recovery phase, not weeks later.
Quick Tip:
- Begin ankle alphabet exercises (seated, non-weight-bearing) within 48 to 72 hours if pain allows
- Apply compression and elevate the ankle between movement sessions in the first three days
- Use pain as your primary guide: 3 out of 10 pain is generally acceptable during early rehab; 6 out of 10 or higher is a stop signal
Ankle Sprain Grades and What They Mean for Exercise
Ankle sprain grade refers to the severity of ligament damage, and it directly determines which exercises are appropriate and when. There are three grades, each with a different exercise starting point.
A Grade I sprain involves mild stretching of the ligament with no tear. The joint remains stable. A Grade II sprain involves a partial tear. You’ll notice moderate swelling, bruising, and some loss of function. A Grade III sprain is a complete ligament rupture. The joint is unstable, weight-bearing is extremely painful or impossible, and recovery takes significantly longer.
Most people assume any sprained ankle is the same. The difference in recovery time between a Grade I and a Grade III sprain can be 10 to 12 weeks. Treating a Grade III like a Grade I is one of the most common causes of chronic ankle instability.
| Sprain Grade | Ligament Damage | Typical Swelling | Weight-Bearing | Exercise Start Point |
|---|---|---|---|---|
| Grade I | Stretching, micro-tears | Mild | Possible with discomfort | 24 to 48 hours (gentle ROM) |
| Grade II | Partial tear | Moderate to significant | Painful, limited | 3 to 7 days (protected ROM) |
| Grade III | Complete rupture | Severe | Not possible initially | 2 to 4 weeks (with clinical guidance) |
If you are unsure of your sprain grade, a sports medicine physician or physical therapist can assess it. Functional testing and imaging (X-ray to rule out fracture; MRI for ligament confirmation) are the standard diagnostic tools for Grade II and III injuries.
Ankle Sprain Recovery Timeline by Grade
The ankle sprain recovery timeline varies by grade, but most Grade I sprains resolve functionally within 1 to 2 weeks, Grade II within 3 to 6 weeks, and Grade III within 8 to 12 weeks or longer.
These timelines refer to functional recovery for daily activities and gym training, not the disappearance of all symptoms. Some residual tenderness and stiffness can persist beyond the functional return window, particularly with Grade II and III injuries.
| Recovery Phase | Grade I Timeline | Grade II Timeline | Grade III Timeline | Exercise Focus |
|---|---|---|---|---|
| Acute Phase | Days 1 to 2 | Days 1 to 4 | Days 1 to 7+ | PEACE protocol; rest, elevation, compression |
| Early Mobility Phase | Days 2 to 5 | Days 4 to 10 | Days 7 to 21 | Ankle ROM, non-weight-bearing movement |
| Strengthening Phase | Days 5 to 14 | Days 10 to 28 | Days 21 to 56 | Resistance band, calf raises, gentle loading |
| Proprioception Phase | Day 10 onwards | Day 21 onwards | Day 42 onwards | Balance, single-leg work, BOSU ball |
| Return to Sport/Gym | Week 2 to 3 | Week 4 to 6 | Week 8 to 12+ | Sport-specific drills, full loading |
These are general clinical guidance ranges cited by the American Physical Therapy Association (APTA). Individual healing rates vary based on age, prior injury history, nutritional status, and adherence to rehab protocols. Confirm your specific return timeline with your treating clinician.
Key Takeaway: Your sprain grade determines your exercise start date. Grade I injuries allow gentle movement within 48 hours; Grade III injuries need clinical clearance before any loading begins.
Can I Exercise With a Sprained Ankle?
Yes, you can exercise with a sprained ankle in most cases, but the key is choosing the right type of exercise at the right phase of recovery. Not all exercise requires a healthy ankle.
For Grade I sprains, seated upper body training, pool walking, and stationary cycling (with minimal ankle dorsiflexion demand) are reasonable within the first few days. For Grade II sprains, the same options apply but with a longer non-weight-bearing window. Grade III sprains require evaluation before any exercise begins.
The most practical answer for most active people is this: your ankle is injured, not your entire body. Upper body strength, seated core work, and cardiovascular conditioning through upper-body-only or low-ankle-demand activities can continue throughout recovery with appropriate modifications.
Key points for exercising with a sprained ankle:
- Avoid any exercise that causes ankle pain above a 3 out of 10 rating
- Non-weight-bearing options (swimming, seated training, upper body ergometer) are safe to begin sooner
- Weight-bearing exercise requires pain-free standing as a prerequisite
- Any activity that involves lateral (side-to-side) ankle movement should wait until full proprioceptive recovery
- A compression bandage or lace-up brace during supported exercise sessions adds protection in the subacute phase
Early Mobilization After Ankle Sprain: What the Research Says
Early mobilization means beginning controlled, gentle movement of the ankle joint within the first 24 to 72 hours of injury rather than immobilizing it completely. Research consistently shows early mobilization produces better outcomes than extended rest.
A study published in the British Journal of Sports Medicine found that early functional rehabilitation (including early range of motion exercise) resulted in faster return to sport and better long-term ankle stability compared to immobilization. A separate analysis in the Journal of Athletic Training confirmed that early weight-bearing, when tolerated, reduces total recovery time without increasing re-injury risk.
The physiological reason is straightforward. Ligament tissue heals through a process that depends on controlled mechanical loading to orient collagen fibers correctly. Complete immobilization leads to disorganized scar tissue and joint stiffness. Think of it like this: leaving a cut completely unstretched as it heals can cause the scar tissue to bind and restrict movement. Controlled early loading keeps the healing tissue functional.
NATA guidelines support early protected mobilization for Grade I and Grade II sprains, emphasizing pain-free range of motion as the starting point. Grade III injuries represent the exception: significant instability may require short-term protected immobilization before loading begins.
Early mobilization benefits include:
- Faster reduction of edema (swelling) through pumping action of muscle contractions
- Improved proprioceptive input to the central nervous system
- Faster restoration of ankle range of motion
- Reduced muscle atrophy around the ankle joint
- Earlier return to functional daily activity and sport
Range of Motion Exercises for a Sprained Ankle
Range of motion (ROM) exercises for a sprained ankle are gentle, non-loaded movements designed to restore full ankle mobility and are typically the first type of exercise appropriate after the acute inflammation phase.
These exercises are performed seated or lying down in the early stages. No body weight goes through the ankle. The goal is moving the ankle through its full natural range: up (dorsiflexion), down (plantarflexion), inward (inversion), and outward (eversion), while maintaining pain below a 3 out of 10.
To perform the ankle alphabet exercise (ankle circumduction exercise):
- Sit in a chair with your injured foot elevated slightly off the floor.
- Keep your leg still and use only your ankle and foot to move.
- Trace each letter of the alphabet in the air using your big toe as the pen.
- Move slowly and with control. Full letters, not rushed partial shapes.
- Rest for 60 seconds after completing the alphabet. Perform 1 to 2 rounds per session, 2 to 3 times per day.
To perform ankle pumps (ankle dorsiflexion and plantarflexion):
- Sit or lie down with your leg relaxed.
- Slowly flex your foot upward toward your shin as far as comfortable.
- Hold for 2 seconds.
- Point your foot away from your shin fully.
- Hold for 2 seconds. Repeat 10 to 15 times per set.
Beginner modification: Perform ankle pumps in a pool or bath. Water reduces gravity’s effect and allows freer movement with less discomfort.
Do not perform ROM exercises if your ankle is still in the acute inflammatory phase (active, significant swelling that is hot to the touch). Wait until swelling begins to noticeably reduce.
Key Takeaway: Range of motion exercises are the entry point for every sprained ankle rehab program. Start them seated, keep pain below a 3 out of 10, and treat full pain-free ROM as your green light for the next phase.
Ankle Strengthening Exercises After a Sprain
Ankle strengthening exercises target the muscles surrounding the ankle joint, particularly the peroneal muscles (peroneus longus and peroneus brevis), the tibialis anterior, and the gastrocnemius and soleus (calf complex). These muscles must be strong enough to protect the ligaments from future sprains.
Strengthening begins after you have achieved pain-free weight-bearing and full or near-full range of motion. For Grade I sprains, that window is roughly days 5 to 10. For Grade II, it’s more like days 10 to 21.
Resistance band exercises are the standard starting point for ankle strengthening. A theraband (resistance band) provides light, controlled resistance without heavy loading.
To perform resistance band eversion (peroneal muscle exercise):
- Sit with your leg extended. Loop a resistance band around the ball of your foot.
- Anchor the other end of the band to your opposite foot or a stable object.
- Slowly turn your foot outward (eversion) against the band’s resistance.
- Hold for 2 seconds at end range.
- Return slowly to start. Complete 3 sets of 12 to 15 repetitions.
Bilateral calf raises (standing heel raises, two-leg version):
- Stand with feet hip-width apart, holding a support lightly.
- Rise onto the balls of both feet slowly (2 seconds up).
- Hold the top position for 1 second.
- Lower slowly (3 seconds down). Complete 3 sets of 15 repetitions.
Beginner modification: Perform seated calf raises with no added weight before progressing to standing.
Progress to single-leg calf raises (unilateral heel raises) only when bilateral calf raises are pain-free and easy. Single-leg loading is significantly more demanding on the healing ankle joint.
Balance and Proprioception Training for Ankle Sprain Recovery
Proprioception training targets the body’s ability to sense joint position in space and is one of the most underutilized and research-supported phases of ankle sprain rehabilitation. It directly reduces re-injury risk.
After a sprain, the nerve endings embedded in the ankle ligaments (mechanoreceptors) are damaged along with the tissue itself. Even after the ligament physically heals, proprioceptive deficits often remain. A study published in the Journal of Athletic Training found that athletes who completed proprioceptive training programs after ankle sprain had a re-injury rate roughly 50% lower than those who did not.
This phase begins once full weight-bearing is pain-free and ankle strength has been partially restored. For Grade I, that’s typically around days 10 to 14. For Grade II, around weeks 3 to 4.
Proprioception progressions:
| Exercise | Starting Difficulty | Progression |
|---|---|---|
| Two-foot balance (flat surface) | Eyes open | Eyes closed |
| Single-leg stand (stork stand) | Eyes open, near wall | Eyes closed, no support |
| Single-leg stand on foam pad | Stable foam | Unstable foam |
| BOSU ball two-foot stand | Dome side up | Platform side up |
| BOSU ball single-leg stand | Dome side up, eyes open | Eyes closed |
| Wobble board balance | Two feet | Single leg |
Beginner modification: Begin all single-leg balance work near a wall. Touch one or two fingertips to the wall as needed. The goal is removing that support over time, not eliminating it immediately.
Do not progress to wobble board or BOSU ball single-leg work until static single-leg balance on flat ground is comfortable and stable for at least 30 seconds.
Can I Do Cardio With a Sprained Ankle?
Yes, you can do cardiovascular exercise with a sprained ankle, but the right cardio type depends on your recovery phase and how much ankle loading is involved. Some cardio options demand almost no ankle movement; others require significant joint stability.
Low or zero ankle demand cardio options:
- Upper body ergometer (UBE): A machine that works like a bicycle for your arms. Zero ankle involvement. Available in most physical therapy clinics and some gyms.
- Swimming (upper body only): Using a pull buoy between your legs removes all kicking and ankle movement. Full upper body cardiovascular work with zero lower limb loading.
- Seated rowing (arms only): Some cable machines allow seated arm pulling without lower limb drive. Not a pure rowing motion, but useful for cardiac output.
Moderate ankle demand options (appropriate in mid-recovery, Grade I from week 1, Grade II from week 3):
- Stationary bike: Requires some ankle dorsiflexion and plantarflexion. Start with low resistance and a low cadence. Observe for ankle swelling after each session.
- Pool walking: Water buoyancy reduces body weight through the ankle by approximately 50 to 75% at chest depth, per research from the Journal of Orthopaedic and Sports Physical Therapy. This allows progressive weight-bearing without full loading.
High ankle demand options (late recovery only):
- Treadmill walking: Full weight-bearing. Appropriate only when pain-free walking on flat ground is achieved.
- Elliptical: Requires ankle stability throughout the stride cycle. Appropriate in late Phase 2 or Phase 3 of recovery.
Key Takeaway: Proprioception training and the right cardio selection are the two most commonly skipped parts of ankle sprain rehab, yet both directly prevent re-injury and maintain fitness during recovery.
Upper Body and Seated Workouts During Ankle Recovery
Upper body and seated training can begin within the first 24 to 48 hours of a sprained ankle injury in most Grade I and Grade II cases, keeping your strength and fitness work on track while the ankle heals.
This is the part most online ankle sprain guides completely skip. Your upper body is not injured. Your cardiovascular system doesn’t care about your ankle. There is no physiological reason to stop training your chest, back, shoulders, or arms while you recover.
Safe upper body and seated exercises during ankle recovery:
- Seated dumbbell press (shoulder press, seated): Performed on a bench with full back support. No ankle loading.
- Seated cable rows: Sit on the cable row bench, drive through the seat, not the feet.
- Dumbbell bicep curls and tricep extensions: Seated or lying down. Zero ankle involvement.
- TRX suspension training (upper body): Rows, face pulls, chest press variations. All performed with hands, not feet. Anchor TRX appropriately.
- Bench press and dumbbell chest press: Lying flat. Keep feet on the bench if ankle positioning on the floor is uncomfortable.
- Seated core work: Seated abdominal compressions, pallof press variations from a chair or bench.
Modification for Grade III sprains: Avoid any exercise that requires you to brace through the floor with your injured foot. Ensure stable seating before beginning any upper body work.
One practical caution: some exercises that feel upper-body-only actually require ankle stability as part of the base of support. Standing overhead press, standing barbell rows, and deadlifts all load the ankle. These must wait for clearance.
Exercises to Avoid With a Sprained Ankle
Certain exercises carry a high re-injury risk during ankle sprain recovery and should be avoided until your ankle has progressed through all rehabilitation phases. The general rule is: if it requires fast, unpredictable ankle movement or heavy ground reaction force, it waits.
Exercises to avoid during the acute and early subacute phases:
- Running and jogging: Full weight-bearing impact. Even light jogging creates ground reaction forces 2 to 3 times body weight through the ankle.
- Jump rope: High repetitive impact. Demands rapid plantarflexion and landing stability.
- Box jumps and plyometrics: Landing forces and reactive demands far exceed what a healing ligament can handle.
- Lateral shuffle drills and agility ladder work: High lateral ankle loading. The anterior talofibular ligament (ATFL), the most commonly sprained ligament, is under maximum stress during inversion movements that agility drills require.
- Heavy barbell squats and deadlifts: Significant ankle dorsiflexion demand under load.
- Lunges: Weight shift and single-leg loading creates significant lateral ankle stress.
- HIIT (high-intensity interval training) with floor-based movements: Combines impact, speed, and multidirectional movement at a point in recovery where none of those are appropriate.
The principle behind this list isn’t overcaution. It’s biomechanics. The anterior talofibular ligament (ATFL) is most vulnerable during inversion under load or at speed. Until proprioception training has restored neuromuscular control, your body cannot react fast enough to prevent another inversion event during dynamic exercise.
Warning Signs to Stop Exercising During Ankle Recovery
Stop exercising immediately and reassess if you experience any of these warning signs during ankle sprain recovery. These signals indicate you may be loading the joint beyond its current healing capacity.
Warning signs to stop and evaluate:
- Sharp, stabbing pain at the ankle during or after exercise (distinct from dull, general muscle soreness)
- Increased swelling after a session compared to before it started
- Warmth or redness returning to the ankle after it had begun to resolve
- Giving way or instability feeling during standing or movement
- Pain level above 3 out of 10 during any exercise that persists beyond a few repetitions
- Joint clicking or locking that was not present before the session
- Numbness or tingling below the ankle or in the toes
Post-exercise swelling assessment is one of the most practical self-monitoring tools available. Measure or visually compare your ankle circumference before and 30 minutes after exercise. Any visible increase in swelling indicates you exceeded the current loading threshold.
According to the American Physical Therapy Association (APTA), post-exercise pain and swelling that exceeds pre-exercise levels is a reliable clinical indicator to reduce exercise intensity or volume, not push through.
If any of these warning signs appear more than once across separate sessions, reduce your exercise intensity and see a physical therapist for assessment before progressing further.
Key Takeaway: Post-exercise swelling is your most reliable indicator that you pushed too hard. Check your ankle before and 30 minutes after every session during recovery.
When to Use an Ankle Brace During Exercise
An ankle brace provides external mechanical support to the joint and reduces the risk of re-injury during exercise, particularly in the mid to late recovery phases when you’re beginning weight-bearing activities.
There are two primary brace types relevant to ankle sprain rehab:
| Brace Type | Support Level | Best Use Phase | Examples |
|---|---|---|---|
| Compression sleeve | Low (swelling control only) | Acute phase (days 1 to 5) | Tubular bandage, elastic sleeve |
| Lace-up ankle brace | Moderate (limits inversion) | Subacute to return to activity | McDavid, Zamst A2-DX |
| Semi-rigid ankle brace | High (limits inversion/eversion) | Late rehab and return to sport | Aircast, DonJoy Stabilizing |
Research published in the Journal of Athletic Training found that lace-up ankle braces reduced the incidence of ankle sprain re-injury during sport by approximately 50% compared to no brace, without negatively affecting athletic performance. This makes brace use particularly valuable during the transition from rehabilitation back to sport or gym training.
Wearing a brace does not mean your ankle is healed. It means the brace is supplementing joint stability that your own neuromuscular system has not yet fully restored. The long-term goal is to restore sufficient proprioception and strength to not need the brace for daily activities, while still using it for high-risk sports and heavy gym training indefinitely if preferred.
Modification note: If a semi-rigid brace causes discomfort or rubbing during exercise, a lace-up brace worn over a thin sock is a comfortable alternative that provides meaningful protective support.
How to Prevent Ankle Sprain Re-Injury With Exercise
The most effective way to prevent ankle sprain re-injury is completing the full rehabilitation program, including proprioception training, rather than stopping rehab the moment pain resolves. Pain going away does not mean the ligament is fully healed or that neuromuscular control has been restored.
Research from the British Journal of Sports Medicine indicates that individuals who sustain one ankle sprain have a re-injury risk approximately 3 to 5 times higher than those who have never sprained their ankle. The primary driver of this elevated risk is incomplete proprioceptive recovery, not ligament strength alone.
A prevention-focused exercise program includes four elements:
- Continued single-leg balance training: 3 to 4 sessions per week for at least 6 weeks after returning to full activity. Progress from flat surface to unstable surfaces progressively.
- Peroneal muscle strengthening: Maintain resistance band eversion exercises 2 to 3 times per week as ongoing maintenance, not just during the acute rehab period.
- Ankle brace use during high-risk sport: Evidence supports ongoing brace use for sport for at least 12 months after a significant ankle sprain.
- Hip and gluteus medius strengthening: Weak hip abductors contribute to excessive inward knee collapse (valgus), which creates downstream lateral ankle loading. Including exercises like lateral band walks (monster walks) and clamshells in your program reduces overall lower limb injury risk.
Quick Tip:
- Single-leg balance training on a wobble board or BOSU ball is the highest-return-on-time proprioception drill available
- 10 minutes of balance and peroneal work per session, three times per week, is the research-supported prevention dosage
- Never skip the proprioception phase just because the pain is gone
When to Return to Sport or Full Gym Training After Ankle Sprain
Return to sport or full gym training after a sprained ankle requires passing functional criteria, not just waiting a fixed number of weeks. Time alone is not the standard.
The current clinical standard, supported by the American College of Sports Medicine (ACSM), uses a criteria-based return-to-sport model. You return when you meet the criteria, regardless of whether that takes 2 weeks or 12.
Criteria for return to full gym training:
- Full pain-free range of motion in all ankle directions
- Single-leg calf raise strength equal to your uninjured side (within 90% of symmetry)
- Single-leg balance time on the injured ankle equal to the uninjured side on an unstable surface
- No post-exercise swelling after moderate training sessions
- Ability to walk, jog, and change direction without pain or hesitation
Criteria for return to high-impact sport (running, jumping, cutting):
- All gym criteria met
- Pain-free single-leg hop test (hop for distance, hop for repetitions)
- Ability to perform 10 side shuffles in each direction without ankle discomfort
- Confidence (self-reported) to perform sport-specific movements without fear of giving way
Return-to-sport should be progressive. Jogging before sprinting. Sprinting before cutting. Cutting before reactive agility work. Do not jump straight from “pain-free walking” to full team training.
Key Takeaway: Return to sport is a criteria-based decision, not a calendar-based one. Meet the functional standards first, then start sport-specific progressions. Time alone tells you nothing reliable.
When to See a Physical Therapist About Your Ankle Sprain
See a physical therapist if your ankle sprain symptoms are not improving after 5 to 7 days of self-managed care, if you cannot bear weight after 48 hours, or if you suspect a Grade II or Grade III sprain based on significant swelling, bruising, and instability.
Many people self-manage minor Grade I sprains effectively with the PEACE and LOAD framework. But professional assessment adds value in several specific situations, and skipping it when it’s warranted is one of the most common reasons people develop chronic ankle instability.
Situations that warrant physical therapist assessment:
- You cannot bear weight on the ankle after 48 hours
- Swelling has not begun to reduce after 72 hours
- You heard or felt a “pop” at the time of injury
- You have significant bruising spreading beyond the ankle
- You have sprained the same ankle multiple times
- Your ankle feels “loose” or gives way during walking
- You are an athlete with a competitive season approaching
- You are over 50 and have osteoporosis or prior lower limb injuries
A physical therapist will confirm your sprain grade, assess for associated injuries (bone fractures are present in approximately 15% of ankle sprains that initially appear ligamentous only, per the Journal of Orthopaedic and Sports Physical Therapy), and build a structured, progressive rehabilitation program specific to your situation.
If your injury occurred during sport and you have access to a sports medicine physician, that is also an appropriate first contact. Imaging decisions (X-ray, MRI) are best made by a clinician who can assess your specific injury presentation in person.
Frequently Asked Questions About Ankle Sprain Exercise
How long should I rest a sprained ankle before exercising?
For a Grade I sprain, full rest is typically only needed for the first 24 to 48 hours.
After that, gentle non-weight-bearing range of motion exercise is appropriate and beneficial according to current ACSM guidelines.
Grade II and III sprains require longer protected periods, ranging from 3 to 7 days up to several weeks, depending on severity.
Can I go to the gym with a sprained ankle?
Yes, most people with Grade I or Grade II sprains can train at the gym within the first week, using upper body and seated exercises that don’t load the ankle.
Avoid any standing exercise, leg press, or floor-based movement that requires ankle stability until your recovery phase allows it.
Always confirm your plan with a clinician if you are unsure of your sprain grade or have significant swelling.
What is the first exercise I should do after spraining my ankle?
The first exercise recommended after the acute phase is the ankle alphabet exercise (ankle circumduction exercise), performed seated with the foot elevated off the floor.
This restores range of motion through the full ankle arc without any weight-bearing stress on the healing ligament.
Begin with one set of the full alphabet, twice daily, as soon as movement is tolerable and below a 3 out of 10 pain rating.
How do I know if my sprained ankle is healed enough to exercise?
The functional markers of adequate healing for progressing exercise are: full pain-free range of motion, no post-exercise swelling, and the ability to bear full body weight without pain.
These markers must be met before progressing from range of motion work to strengthening, and from strengthening to proprioception and return-to-activity drills.
Pain going away is a useful signal but it is not sufficient on its own. Strength and balance symmetry with the uninjured side are the more reliable functional tests.
What happens if I exercise too soon after a sprained ankle?
Exercising too soon after a sprained ankle before swelling has stabilized and pain is controlled can worsen ligament damage, delay collagen remodeling, and increase the risk of developing chronic ankle instability.
Research in the British Journal of Sports Medicine has linked inadequately rehabbed ankle sprains to long-term mechanical instability and increased risk of ankle osteoarthritis over time.
If your ankle swells more after exercise than before it, that is a reliable signal that you have exceeded your current loading tolerance.
Getting Back to Exercise After a Sprained Ankle: Where to Start
The timeline for returning to full training after a sprained ankle is individual. Your grade, your age, your prior injury history, and how consistently you follow the rehab progression all matter. But the broad structure is the same for everyone: range of motion first, then strength, then proprioception, then return to sport.
Don’t skip the proprioception phase. It’s the most frequently abandoned part of ankle rehab and the primary reason people re-sprain the same ankle repeatedly.
If your ankle isn’t improving with self-management within 5 to 7 days, get it assessed by a physical therapist or sports medicine physician. The cost of a session now is far less than the cost of chronic ankle instability later.