
RIR in fitness stands for Reps in Reserve, a number that tells you how many more reps you could have done before reaching complete muscular failure on a given set. It’s one of the most practical tools in modern strength training, because it puts a number on something every serious lifter already does intuitively: stop a set before they actually can’t move the weight.
The reason this matters goes beyond semantics. Research published in the Journal of Strength and Conditioning Research has shown that training intensity, specifically how close you train to failure, is one of the primary drivers of muscle growth and strength adaptation. Getting that intensity wrong, either too easy or too hard every single session, blunts your results over time.
This guide covers what RIR means, how the RIR scale works, how to calculate your own reps in reserve, how it compares to RPE and percentage-based training, and which RIR ranges are most appropriate for different goals and experience levels.
What Does RIR Mean in Fitness
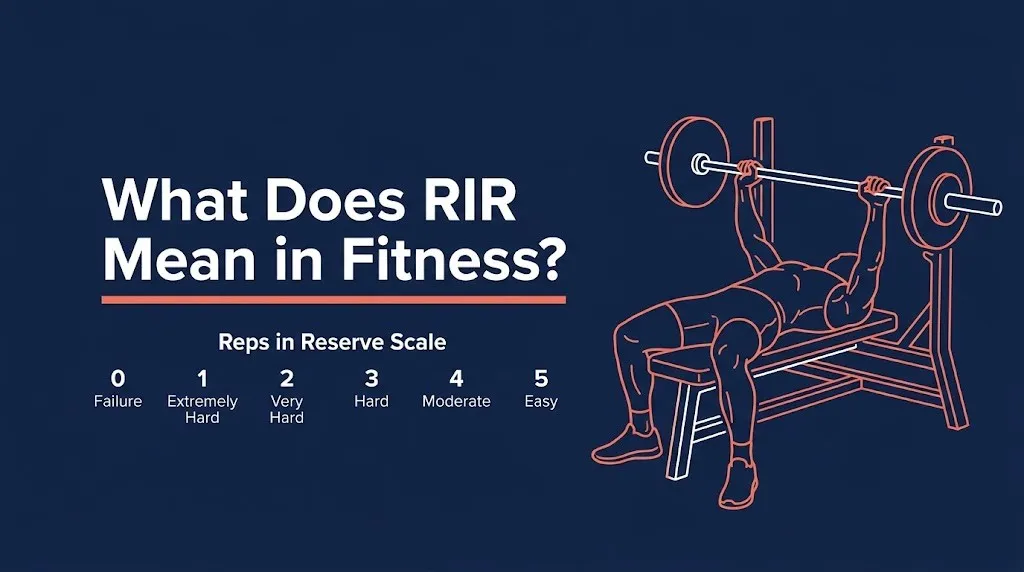
RIR in fitness means Reps in Reserve, a self-reported number describing how many additional reps a person could perform with good form before a set reaches true muscular failure.
If you complete 8 reps on a bench press and feel like you could have done 2 more before the bar would not move, that’s an RIR of 2. The concept is simple in principle, but it takes real training experience to apply accurately.
RIR was formalized as a training tool largely through the work of strength researchers including Eric Helms, who helped develop the RIR-based autoregulation framework now used widely in evidence-based strength and hypertrophy programming. It shifted the conversation about training intensity from fixed percentages to a more individualized, day-to-day measurement of how hard you’re actually working.
The core idea behind RIR is that your body doesn’t always perform identically from session to session. Sleep quality, stress, nutrition, and accumulated fatigue all affect how strong you feel on a given day. RIR accounts for that variability in a way that a fixed percentage of your one rep max simply cannot.
Key points to understand about RIR:
- RIR of 0 means you could not perform another full rep. This is absolute muscular failure.
- RIR of 1 means exactly one more rep is possible.
- RIR of 2 to 3 is where most hypertrophy-focused training sits.
- RIR of 4 or more is considered a low-intensity set, typical in warm-ups or early mesocycle weeks.
What Is the Reps in Reserve Scale
The reps in reserve scale is a numbered system, typically running from 0 to 10, that matches a set’s perceived difficulty to an estimated number of remaining reps.
Think of it like a fuel gauge for a specific set. At RIR 10, the tank is full. You’re barely working. At RIR 0, you’re completely empty. Most productive training happens somewhere between RIR 4 and RIR 0, depending on your goal, your exercise selection, and where you are in your training block.
Here is the full RIR scale with practical descriptions:
| RIR Value | What It Means | When to Use It |
|---|---|---|
| 10 | Could do 10+ more reps | Warm-up sets only |
| 8 to 9 | Extremely easy, barely working | Light technique practice |
| 6 to 7 | Moderate effort, breathing elevated | Early weeks of a new program |
| 4 to 5 | Challenging but still conversational | Volume accumulation phases |
| 2 to 3 | Hard, form requires focus | Core hypertrophy and strength work |
| 1 | Very close to failure, last rep is shaky | Peak intensity sets |
| 0 | Absolute failure, cannot complete another rep | Used selectively, mainly isolation exercises |
The National Strength and Conditioning Association (NSCA) recognizes proximity to failure as a key variable in training stimulus. Getting consistently into the 1 to 3 RIR range is generally where meaningful muscle-building stimulus occurs for trained individuals.
Quick Tip:
- Use RIR 4 to 5 in your first week of a new training block.
- Reduce RIR to 2 to 3 by weeks 3 to 4.
- Reserve RIR 0 to 1 for your final weeks before a deload.
How to Calculate Your Reps in Reserve
Calculating your reps in reserve means estimating how many additional clean reps you have left after completing a set, before technical failure. There is no external device that measures this. It’s an internal assessment, trained through repeated practice.
Here is how to estimate your RIR accurately:
- Complete your working set at a weight that challenges you.
- Rack the weight or stop the movement at your chosen rep count.
- Ask yourself immediately: If my life depended on it, how many more full, clean reps could I complete right now?
- Assign a number. Be honest. If you feel strong, that’s RIR 3 to 4. If the last rep was a genuine grind, that’s RIR 1.
- Record the number alongside your sets, reps, and weight in your training log.
- Adjust over time. After several sessions, you’ll identify whether you’re consistently overestimating or underestimating your capacity.
The most common error is stopping too early and calling it RIR 2 when it was actually closer to RIR 5. This is particularly common with beginners, which is covered in detail in a later section.
Modification note: If you’re returning to training after an injury or extended break, err toward RIR 3 to 4 for the first two to three weeks. Your capacity will change quickly, and starting conservatively protects against early overexertion. If you’re recovering from a spinal, joint, or surgical issue, confirm an appropriate starting intensity with your treating physiotherapist or physician before assigning any RIR target.
Key Takeaway: RIR stands for Reps in Reserve, measures how close a set is to muscular failure, and gives your training intensity a number you can track and adjust over time.
RIR vs RPE: What Is the Difference
RIR and RPE are related but distinct measurements: RPE (Rate of Perceived Exertion) measures overall effort on a 1 to 10 scale, while RIR specifically counts estimated remaining reps before failure.
RPE has a broader application. It’s used across endurance sports, cardiovascular training, and general exercise science to rate how hard any activity feels. An RPE of 7 on a treadmill simply means you’re working fairly hard.
RIR is more specific to resistance training. It attaches a precise number to your remaining capacity within a single set. That precision makes it more actionable for strength and hypertrophy programming.
The two scales are also directly linked. A set at RIR 0 corresponds roughly to RPE 10. A set at RIR 3 corresponds to roughly RPE 7. Many strength coaches and researchers use the terms interchangeably in resistance training contexts, which adds to the confusion.
| RPE | Approximate RIR | Description |
|---|---|---|
| 10 | 0 | Absolute maximum effort |
| 9 | 1 | One rep left in the tank |
| 8 | 2 | Two reps remaining |
| 7 | 3 | Three reps remaining |
| 6 | 4 | Four reps remaining |
| 5 or below | 5+ | Light to moderate effort |
The practical difference: use RPE for general effort across cardio or circuit sessions. Use RIR specifically when programming strength and hypertrophy sets, because it gives you a clearer target to hit and a clearer record to compare week to week.
According to a 2019 review in the Journal of Sports Science and Medicine, RIR-based autoregulation produced similar strength gains to percentage-based training while reducing the risk of overtraining during high-volume phases.
What Does 2 RIR Mean in Practice
2 RIR means you stopped a set with exactly two clean reps remaining before reaching muscular failure. In practical terms, your last completed rep was hard but controlled, and you could have grinded out two more with correct form.
This is one of the most commonly prescribed RIR targets in hypertrophy programming. It places you close enough to failure to generate a strong training stimulus without pushing you into the territory where form breaks down or injury risk increases sharply.
Here’s what 2 RIR should feel like during a set:
- Your last rep required real concentration to complete.
- Your breathing is elevated and your muscles are burning.
- You feel certain you have two reps left, not hopeful.
- You’re not guessing. You feel it as a clear physical sense of remaining capacity.
If you’re unsure whether you hit 2 RIR, you probably didn’t. Real 2 RIR feels close. If the set felt easy and you’re estimating you “probably” had 2 left, that’s more likely RIR 4 or 5.
A useful real-world comparison: 2 RIR is like running at a pace where you know you could sprint for another 30 seconds, but you genuinely don’t think you could hold it for 60. The boundary is clear and felt, not theoretical.
Beginner note: If you’re unsure where 2 RIR sits for a given exercise, do a test set. Warm up fully, then do reps at a moderate weight until you reach what you believe is failure. Count backwards. That gives you a calibration point for future sessions.
What RIR Should You Train at for Your Goal
The correct RIR target depends on your primary training goal: strength, muscle growth, muscular endurance, or general fitness. Choosing the wrong RIR for your goal is one of the most common programming errors, and it silently limits results.
| Training Goal | Recommended RIR Range | Rep Range | Notes |
|---|---|---|---|
| Maximum Strength | 1 to 3 | 1 to 5 | Higher loads, more rest between sets |
| Muscle Growth (Hypertrophy) | 0 to 3 | 6 to 15 | Proximity to failure matters more here |
| Muscular Endurance | 3 to 5 | 15 to 30 | Volume-focused, less individual set intensity |
| General Fitness / Health | 3 to 5 | 8 to 15 | Consistency and form over max intensity |
| Power Development | 4 to 6 | 1 to 5 | Speed and bar velocity are the priority |
| Beginners (any goal) | 3 to 5 | 8 to 12 | Learning movement patterns comes first |
The American College of Sports Medicine (ACSM) recommends that novice trainees focus on consistent technique and progressive load before manipulating intensity targets like RIR. Getting form right matters more than optimizing proximity to failure in the early months.
For experienced lifters targeting muscle growth, training consistently in the 0 to 3 RIR range across most working sets produces the greatest hypertrophic stimulus. Research published in Medicine and Science in Sports and Exercise supports the principle that proximity to failure, not absolute load, is the primary driver of muscle fiber recruitment in trained individuals.
Quick Tip:
- Match your RIR to your goal, not to how the exercise feels in isolation.
- A leg press at RIR 2 serves hypertrophy. A deadlift at RIR 2 serves strength.
- When in doubt, start at RIR 3 and reduce by one each week.
Key Takeaway: Different training goals require different RIR ranges. Hypertrophy benefits most from 0 to 3 RIR, strength work typically sits at 1 to 3, and beginners of any goal should start at 3 to 5 while learning movement patterns.
RIR for Muscle Growth and Hypertrophy
For muscle growth, training between RIR 0 and RIR 3 consistently produces the strongest hypertrophic stimulus across most exercises and rep ranges. The closer you are to failure, the greater the recruitment of high-threshold motor units, which are the muscle fibers most responsible for growth.
This is the core principle behind proximity to failure as a training variable. Your body recruits muscle fibers in an ordered sequence, moving from slow-twitch to fast-twitch as fatigue increases. Only when you’re close to failure does the full spectrum of fibers get recruited. Sets stopped too far from failure leave high-threshold fibers under-stimulated.
A 2022 analysis in the Journal of Strength and Conditioning Research found that sets performed at RIR 0 to 2 consistently produced greater muscle protein synthesis responses compared to sets stopped at RIR 4 or more, when total volume was equated.
For hypertrophy-specific programming:
- Target RIR 2 to 3 for most working sets during accumulation phases.
- Push to RIR 0 to 1 on final sets of key exercises during intensification phases.
- Reserve RIR 0 (failure) for isolation exercises like bicep curls, cable flyes, or leg extensions rather than barbell back squats or Romanian deadlifts (RDLs).
Modification for limited mobility: If a primary compound movement causes joint discomfort, substitute a machine equivalent at the same RIR target. A leg press substitutes for a squat. A chest-supported row substitutes for a barbell bent-over row. The RIR principle works identically on machine exercises.
Safety note: Training repeatedly to RIR 0 on spinal-loading exercises like the back squat or deadlift carries elevated injury risk. Prioritize RIR 1 to 2 as the floor for those movements in most programming contexts.
RIR for Strength Training and Powerlifting
In strength training and powerlifting, RIR targets typically run slightly higher than in hypertrophy work, sitting between RIR 1 and RIR 3 on most heavy sets. This is because maximum strength development requires lifting heavy loads with high-quality technical execution, and form breaks down more consequentially on low-bar squats, deadlifts, and bench presses than on isolation exercises.
The NSCA recommends that competitive and recreational powerlifters use autoregulation, including RIR-based targets, to manage day-to-day variation in strength readiness. Heavy training days that feel off shouldn’t push through to RIR 0 on maximal attempts. Adjusting load to maintain a target RIR protects against injury while still providing a sufficient training stimulus.
For strength-specific programming:
| Movement Type | Working Set RIR | Competition-Prep RIR |
|---|---|---|
| Barbell Back Squat | 2 to 3 | 1 to 2 |
| Conventional or Sumo Deadlift | 2 to 3 | 1 to 2 |
| Bench Press | 1 to 2 | 0 to 1 |
| Overhead Press | 2 to 3 | 1 to 2 |
| Accessory / Isolation Lifts | 1 to 2 | 0 to 1 |
A practical rule used widely in powerlifting communities: never miss a rep in training. This aligns with an RIR floor of 1. If you think you have zero reps left and you attempt another, you’re in technical failure territory, which serves very little productive purpose during a strength block.
Modification: Lifters returning from a back or hip injury should not use RIR 0 to 1 targets on spinal-loading movements until cleared by a sports medicine physician or physiotherapist. In the interim, RIR 3 to 4 at reduced load allows continued training while managing tissue stress.
How to Use RIR for Compound vs Isolation Exercises
The appropriate RIR target differs between compound exercises (multi-joint movements) and isolation exercises (single-joint movements), because the fatigue, technical complexity, and injury consequences are entirely different between the two.
This is the gap that almost every RIR article online ignores, and it matters practically every time you step under a bar.
Compound movements like the barbell back squat, deadlift, bench press, and weighted pull-up involve multiple joints, large muscle groups, and significant spinal or joint loading. Technical breakdown under extreme fatigue on these exercises creates real injury risk. Pushing a barbell squat to RIR 0 regularly is a different proposition than pushing a dumbbell lateral raise to RIR 0.
Isolation movements like the bicep curl, tricep pushdown, leg extension, or cable lateral raise involve a single joint, lower loads, and much lower technical complexity. Reaching RIR 0 on these exercises is generally lower risk and is often appropriate during hypertrophy phases.
Guidelines for applying RIR by exercise type:
| Exercise Type | Examples | Recommended RIR Floor | Notes |
|---|---|---|---|
| Heavy Compound (Spine-Loading) | Squat, Deadlift | 1 to 2 | Never train to failure under a barbell without safety equipment |
| Moderate Compound | Bench Press, Row, Overhead Press | 1 | Failure acceptable on machines; avoid with free weights |
| Light Compound / Machine | Leg Press, Chest Press Machine | 0 to 1 | Failure is manageable and productive |
| Isolation / Single-Joint | Curl, Extension, Fly, Raise | 0 | Low injury risk. Failure appropriate in hypertrophy phases |
Beginner modification: New lifters should avoid RIR 0 on any compound barbell movement regardless of exercise type. The technical demands of a heavy squat or deadlift require stability and concentration that absolute failure disrupts completely. Use RIR 3 to 4 for the first eight to twelve weeks on all compound movements.
Key Takeaway: Heavy compound barbell lifts should rarely reach RIR 0 due to injury risk; save close-to-failure training for isolation exercises and machine-based movements where technical breakdown is less dangerous.
Training to Failure vs Leaving Reps in Reserve
Training to failure (RIR 0) and leaving reps in reserve are not opposites. They’re two ends of the same spectrum, and both have a place in well-designed programming. The question is not which is better, but when each is appropriate.
Training to failure generates maximum muscle fiber recruitment and can accelerate hypertrophy in shorter-term phases. But it also generates significantly more fatigue, requires longer recovery, and increases the injury risk on technical movements. Used on every set for every exercise, it leads to accumulated fatigue that eventually tanks performance.
Leaving reps in reserve, typically RIR 1 to 3, allows you to train at a high intensity while managing fatigue. This makes it sustainable across longer training blocks and safer across compound movements with high technical demands.
Research by Helms et al., published in the Journal of Sports Science and Medicine, found that autoregulated training using RIR-based targets maintained strength and hypertrophy gains comparable to fixed-percentage programming while producing lower subjective fatigue ratings across a twelve-week training block.
The practical framework:
- Most sets, most weeks: RIR 1 to 3
- Final sets of priority exercises: RIR 0 to 1
- Isolation exercises in hypertrophy phases: RIR 0 is acceptable and often productive
- Heavy compound lifts: RIR 1 as the absolute minimum floor
Modification: If you’re managing a chronic health condition, training during pregnancy, or working around an injury, RIR 3 to 5 is a sensible ceiling during those periods. A licensed physiotherapist or your treating clinician can help you establish appropriate intensity boundaries that won’t interfere with recovery or condition management.
Why Beginners Struggle to Judge Their RIR Accurately
Beginners consistently underestimate their proximity to failure, meaning they stop sets thinking they have 2 to 3 reps left when research shows they often had 5 to 8 remaining. This is not a character flaw. It’s a documented and well-understood phenomenon in exercise science.
A study published in the Journal of Strength and Conditioning Research found that untrained and novice individuals dramatically overestimated their proximity to failure compared to trained lifters. When taken to objective failure in lab conditions, novice participants had completed far fewer reps than their subjective RIR ratings predicted. They felt like they were at RIR 2 when they were actually at RIR 6 or 7.
The reasons are physiological and psychological:
- Pain and discomfort feel like failure before actual muscular failure occurs.
- Unfamiliar exercises create anxiety that stops sets prematurely.
- Novice lifters have not yet developed the neurological patterns required to drive close-to-failure effort consistently.
- The burning sensation of metabolic fatigue is often confused with the mechanical limit of maximum voluntary contraction.
What this means practically: beginners using RIR targets from an evidence-based program are often training at a much lower intensity than intended. Their “RIR 2” might actually be “RIR 6.”
The solution is calibration through controlled failure testing. Every 3 to 4 weeks on a given exercise, extend one set past your usual stopping point to actually find failure. Count the reps. Then look back at where you stopped previously. That gap is your calibration error.
Quick Tip:
- Use machines for calibration testing. They’re safer to push to true failure.
- Never test failure on barbell squats or deadlifts without a spotter or safety bars.
- Record every calibration set. Your accuracy improves quickly with deliberate practice.
How RIR Changes Across a Training Block
RIR targets are not fixed numbers used identically across every week of a program. In evidence-based programming, RIR decreases progressively over a training block, meaning you train closer to failure as the block advances.
This mirrors the logic of progressive overload, but applied to intensity rather than just weight. In the first week of a four-week block, you might train at RIR 4. By week four, you’re hitting RIR 1. The weight may increase each week, or the RIR may decrease at the same weight. Often both.
Here is a standard RIR progression across a four-week hypertrophy block:
| Week | Target RIR | Volume | Description |
|---|---|---|---|
| Week 1 | 4 to 5 | Moderate | Accumulation begins, fatigue is low |
| Week 2 | 3 to 4 | Slightly higher | Building into working intensity |
| Week 3 | 1 to 2 | Higher | Peak stimulus, close to failure regularly |
| Week 4 (Deload) | 4 to 6 | Reduced by 40 to 50% | Recovery, supercompensation begins |
After the deload week, the next block begins again at RIR 4 to 5, but typically with higher weights than the previous block’s starting point. That’s progressive overload operating over multiple mesocycles.
According to the ACSM, periodized programs that vary intensity and volume across training cycles produce superior long-term strength and hypertrophy outcomes compared to non-periodized approaches where effort stays constant.
Modification: Lifters training with health limitations should not push to RIR 1 to 2 during high-fatigue weeks without clinical clearance. Maintaining a consistent RIR 3 across all weeks of a block is still effective, particularly for general health and beginner-to-intermediate populations.
Key Takeaway: RIR targets should decrease each week within a training block, moving from RIR 4 to 5 in week one down to RIR 1 to 2 by the final week before a deload. This is how evidence-based programs build intensity over time.
RIR vs Percentage of 1RM
RIR and percentage of 1RM (one rep max) are both methods for prescribing training intensity. RIR is more individualized and adapts to daily performance variation. Percentage-based training is more structured but assumes your max is fixed, which it isn’t.
Traditional percentage-based programming prescribes weights as a percentage of your 1RM. If your bench press 1RM is 100kg, a session might call for 75% of 1RM, which is 75kg. This is clear, measurable, and easy to program.
The problem: your actual 1RM fluctuates daily. A poor night’s sleep, high-stress week, or accumulated training fatigue can reduce your true max by 5 to 10% on any given day. A percentage prescription doesn’t know this. You still lift 75kg, which now represents a higher relative effort than planned.
RIR adapts automatically. If you feel weak, a weight that was previously RIR 3 might feel like RIR 1. You can adjust load down to restore your target RIR. Your intensity stays consistent even when your performance varies.
| Factor | Percentage of 1RM | RIR-Based Training |
|---|---|---|
| Precision | High on a good day | Consistent across varying days |
| Daily variation accommodation | None | Built-in |
| Requires strength testing | Yes, regularly | No |
| Learning curve | Low | Moderate (requires calibration) |
| Best for | Beginners, structured programs | Intermediate to advanced lifters |
| Limitation | Ignores fatigue and variation | Requires accurate self-assessment |
The two approaches aren’t mutually exclusive. Many elite programs use percentage-based loading as a baseline and RIR as a daily modifier. If the prescribed weight doesn’t match your target RIR, adjust the load.
How to Start Using RIR in Your Workouts Today
To start using RIR in your workouts, pick one exercise per session, set a specific RIR target before the set begins, and record your actual RIR immediately after completing it.
Starting with all exercises simultaneously creates confusion and inaccurate ratings. One exercise at a time builds the skill quickly.
Follow this process:
- Choose a familiar exercise you’ve performed for at least four to six weeks. Familiarity reduces guesswork.
- Set a target RIR before you start. Write it down: “Target: RIR 3.”
- Warm up fully. Your working set RIR ratings are meaningless if you’re not properly prepared.
- Perform your working set at a challenging weight. Stop at your chosen rep count.
- Immediately assess: How many more clean reps could you honestly do? Assign a number.
- Record both numbers: Target RIR and actual estimated RIR. A consistent gap between the two is your calibration data.
- Adjust weight next session if needed. If you targeted RIR 2 but finished at RIR 5, the weight needs to go up.
- Expand to more exercises once your ratings feel accurate on the first one.
Common mistakes to avoid when starting:
- Rating RIR after resting 30 seconds. Rate immediately, while the set is fresh.
- Using RIR on exercises you haven’t learned properly. Get form right before adding intensity tracking.
- Assigning RIR based on how you feel going into the set, not how you feel after.
- Treating RIR as a perfect science on day one. It takes practice.
Beginner modification: If you’re completely new to resistance training, skip formal RIR tracking for your first four to eight weeks. Focus on learning movement patterns and building comfort with load. Introduce RIR targets once you can perform the major movement patterns with consistent technique.
When to pause and reassess: If you’re experiencing sharp joint pain, numbness, or unusual discomfort during a set, stop the set regardless of your RIR target. Discomfort from effort is normal. Discomfort from injury is a signal to address before continuing. If joint or nerve symptoms persist across sessions, consult a sports medicine clinician to rule out an underlying issue before continuing high-intensity training.
Key Takeaway: Start using RIR by tracking just one exercise per session, comparing your target RIR to your actual RIR after each set, and adjusting load when the gap is consistently large.
Frequently Asked Questions About RIR in Fitness
What does RIR mean in a workout program?
RIR in a workout program means Reps in Reserve, indicating how many additional reps you should have left when you stop each set.
A notation like “3 sets of 8 at RIR 2” means perform 8 reps and stop with 2 reps still possible.
This tells you how close to muscular failure each set should be, which directly controls training intensity.
What is a good RIR for building muscle?
For building muscle, most evidence-based programs recommend an RIR of 0 to 3 on working sets.
Research in the Journal of Strength and Conditioning Research shows that consistent proximity to failure, within 0 to 3 reps of your maximum, is a primary driver of the hypertrophic stimulus.
RIR 2 is a widely used starting point because it’s close enough to failure to be effective while leaving room for form maintenance.
Is 0 RIR the same as training to failure?
Yes, RIR 0 means you have completed the last possible rep and could not perform another with proper form.
This is the definition of momentary muscular failure, specifically technical failure where technique degrades before the muscle is fully exhausted.
RIR 0 is not automatically the best approach. It’s appropriate for some exercises and some phases of training, but should not be used on every set or every movement.
How do I know how many reps I have left in the tank?
Judging reps in reserve comes from deliberate practice and repeated calibration over time.
The most reliable method is to periodically extend a set past your usual stopping point on a safe exercise to find your actual failure point, then compare it to where you normally stop.
Most people, especially beginners, significantly underestimate how many reps they have left. Running calibration sets regularly is the only way to close that gap.
Should beginners use RIR or RPE?
Beginners can use either, but RIR tends to be more practical for resistance training because it gives a specific number tied to remaining reps.
The ACSM recommends that novice trainees focus on consistent technique and gradual load increases before prioritizing precise intensity targets.
Starting with a simple guideline of “the last 2 reps should feel hard but controlled” is an accessible entry point before formal RIR tracking begins.
Putting RIR to Work in Your Training
RIR is one of the most practical intensity tools available to any lifter. It asks you to be honest about how hard you’re actually working and gives you a number you can track, compare, and adjust over time.
Start simple. Pick one exercise. Set a target RIR before the set. Rate your actual RIR immediately after. Write both down. Within a month of doing this consistently, your self-assessment accuracy will improve noticeably, and your training intensity will reflect what your program actually intends.
The goal isn’t to always train at RIR 0. It’s to train at the right RIR for your goal, your exercise, and where you are in your training block. That’s what separates effective programming from just showing up and working hard.